Toon Shading Fundamentals
From Cel-Shading to bidirectional toon ramps
Talked your ear off about line rendering last time uh? Maybe you need some lighter reading? Fret not, for lines is not the only subject in expressive rendering, we also have shading!
In and of itself, shading is a big subject. It also has a lot of overlap with PBR, as it tends to be grounded in reality. But, as with all stylized rendering subjects, the difficulty is in how to use it to achieve a quality look.
In this article, instead of going into a deep multiple article dive, I’m going to take a more focused look at one of the very basic methods you may have already seen: toon shading!
While it is a basic building block, there’s still a lot to learn, and a lot to expand on! I’ll cover both the basics, limits of its use, and going beyond what’s usually done with it!
Basics: What is toon shading?
The base idea of the method of toon shading is to have better control over how an object will appear in light or shadow. There are several ways to implement it, so I’ll focus on the most straightforward one: toon ramps.
Toon ramps are one dimensional textures that match a value of light to a color. In order to do that, you’ll need a parameter to represent that “light value”, which is what I call the lighting coefficient. We’ll see later on how to handle it, but for now we’ll stick with the n.l. If you don’t know what that is or wish for a refresher, click the box below.
 n . l
n . lOur basic building block
The n.l (pronounced “n-dot-l”) is a major component of the rendering equation. It’s a mathematical term representing how much the surface faces the light. Here’s a quick breakdown:
- n is the normal, which is a vector perpendicular to the surface. This represents the direction the surface is looking at. A simple example would be a flat table: the top’s normal is straight up.
- l is the direction to the light source. It can either be fixed for all (in case of sunlight) or changing for each point (like when lit by a lightbulb).
- Finally, the ‘.’ is the dot product. To simplify, since our vectors are normalized in this case, it computes how much the two vectors look in the same direction: 1 is exact same direction, 0 is perpendicular, and -1 is exact opposite directions.
One aspect to keep in mind, is that while the n.l is always between -1 and 1, most rendering applications will cut the -1 to 0 part since they are by definition unlit. In stylized rendering, we might want to keep that negative part, but it might affect our light accumulation step, as we’ll see later in the article.
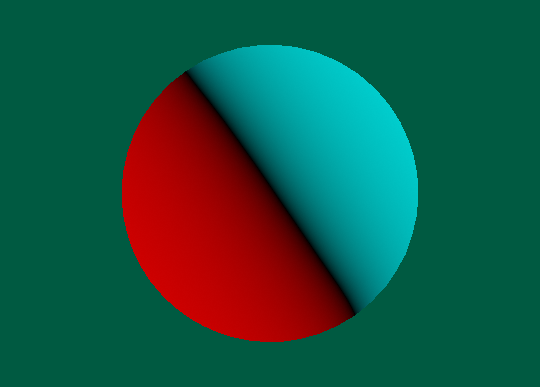
Simple example of n.l over a sphere, lit by a light coming from the right. The positive part is in cyan, while the negative is in red.
This is a bit generic, so let’s illustrate a bit by building some ramps. Let’s start with a neutral one and a constant one to ensure our algorithm works properly. We can make them directly in GIMP or another image editor, as 256x1 images.
Let’s think for a bit. A neutral ramp would need to have increasing values for each pixel, so the 2nd pixel’s value is (2,2,2), the third would be (3,3,3), and so on. It’s a simple linear gradient. On the other hand, the constant needs the same value everywhere. So let’s do just that and see the results:
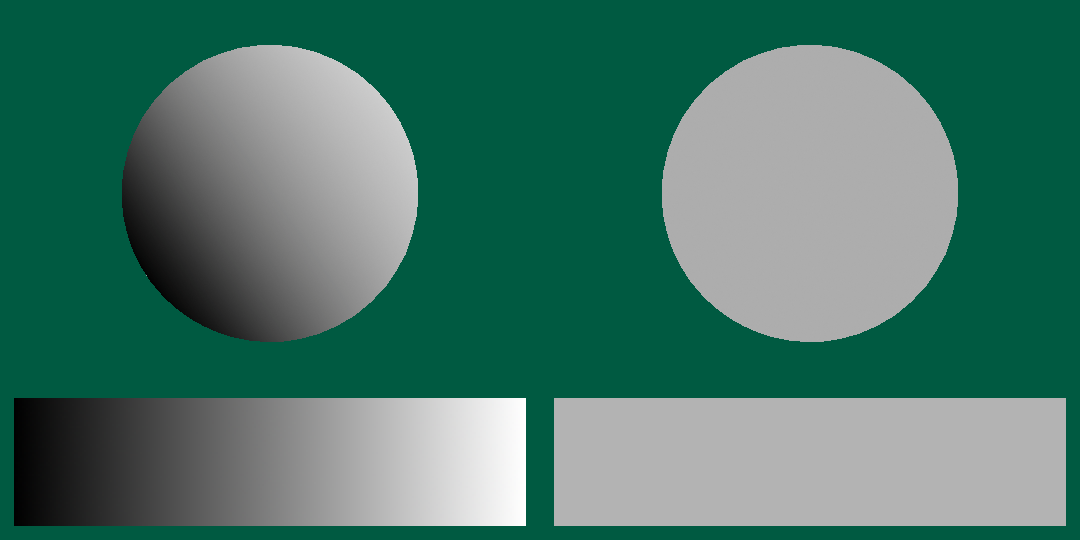
Neutral ramp and constant ramp. You can extract them manually from the pictures, they have been magnified x2 exactly.
Let’s expand a bit more, and build a ramp to simulate two-tone shading. In order to build it, we need to decide where the threshold is, so to simplify I put it in the exact middle.
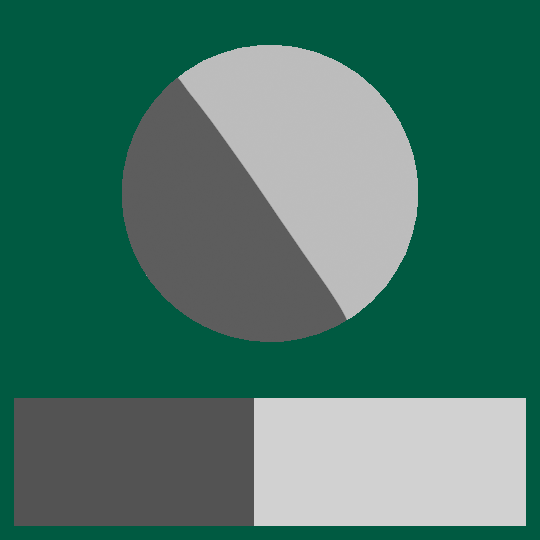
Now it’s starting to look like something!
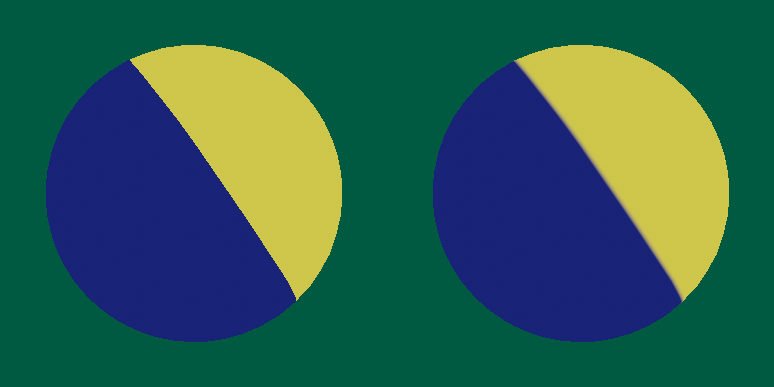
Let’s put some colour into it! I’ll use a light yellow for the lit part, and darker blue for the shaded part. It’s as simple as putting those colours in the ramp.
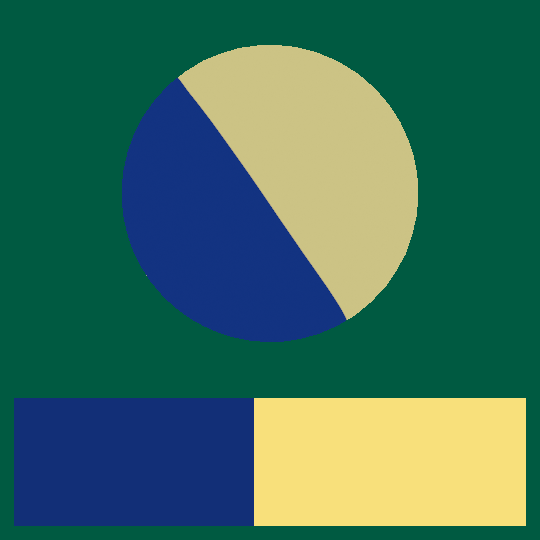
wym i gotta find a caption for each one of these?
Let’s do another one to finish, by adding a gradient to each part, and by making the boundary a bit smoother by blurring it.

You can do more complex behavior with toon ramps thanks to the increased control.
Hopefully this helped you understand that a bit better how it works! We could continue for a long while, it would be like trying to illustrate how colours can be used. Some other forms of toon ramps can be used, for instance by combining it with an albedo to not have to make a new one per object. This is also valid, and we’ll see those a bit later! Some can also be made using math (as shown in the expandable box below).
 Mathematical Toon Ramps
A more quickly adjustable alternative?
This part is a bit more theoretical, but you clicked on the link with ‘math’ in the title so you kinda had it coming.
A more precise definition of a toon ramp would be an injective function over the real range [0, 1]. Therefore, you could use any mathematical function instead of a texture. You can either map each color to a specific function, or the global luminance and then multiply it by an albedo (as we’ll see later).
There are a lot of mathematical functions you may use here, so you can probably find the funky polynomial or Bézier curve of your dreams. Instinctively, I would look towards a sigmoid function, as it has a nice curve that allows us to go from shaded to lit quickly, while also having a nice ease of control with its inflection point being at 0.
The potential advantages of this method is potential speed if your function is quick enough, and additional resolution since you can do it at any scale. A disadvantage can be the difficulty of control, again depending on your function and interface. Of course, you may always bake the function into a texture to go back to the regular toon ramp performance.
Cel-Shading
Sometimes you see “toon shading” and “cel-shading” used interchangeably, but cel-shading is a specific subpart of toon shading, as it refers to using a limited palette to shade, often with only two or three tones. This is derived from hand animation, where in order to avoid differences from frame to frame, they would only use one color for a full zone.
Of course, in a lot of modern styles, you may see a smooth transition between the shaded and lit area, or an additional line, making it not strictly cel-shading in that sense. However, it is conceptually the similar and faces most of the same problems. The edges cases where it matters are a bit beyond the scope of this article.
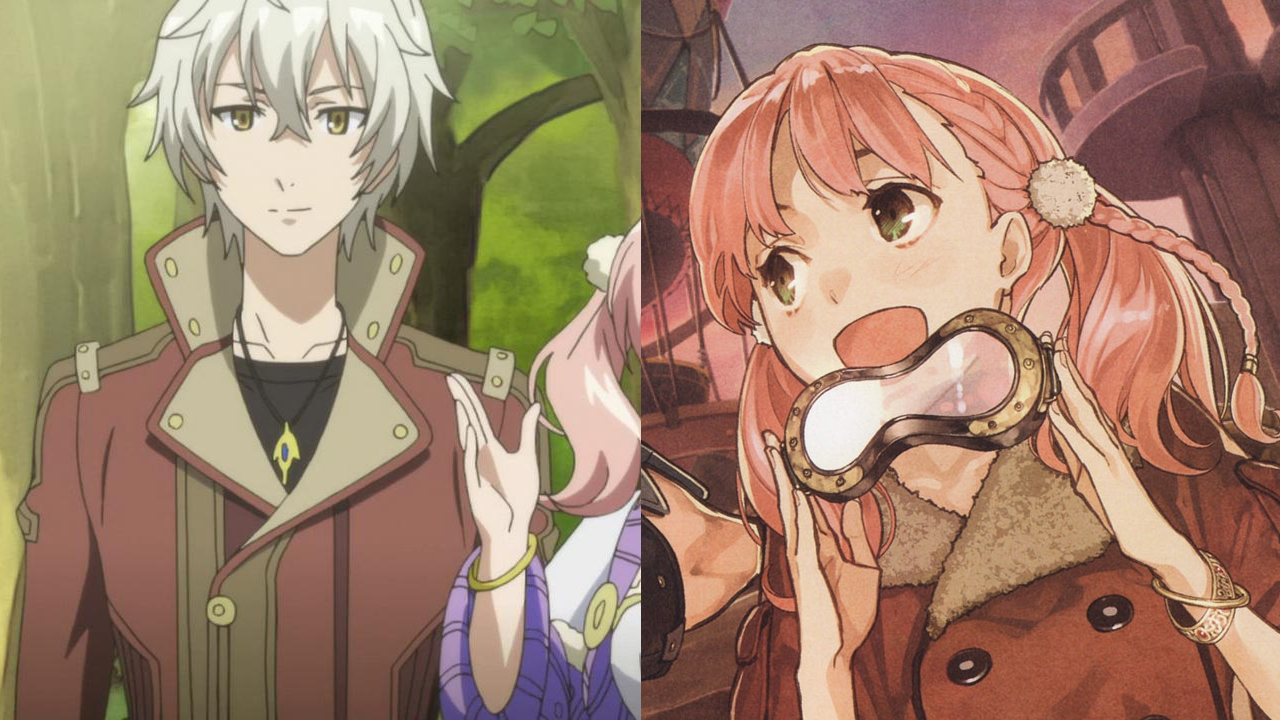
Two handpainted examples of cel-shading. The left image uses strict cel-shading, while the one on the right includes some smooth transitions (like around Escha’s eye). From Atelier: Escha & Logy
Thankfully, these are really simple to make, as it’s literally only two colours around a threshold. Strict cel-shading may benefit from using texelFetch instead of a regular texture call to ensure no smoothing takes places, while smooth cel-shading can be emulated by blurring the ramp.
In fact, those are simple enough that you can actually do it without a ramp, with a threshold and two colours as parameters. This is what I recommend if you are going to make actual cel-shading, as it will make your workflow and control easier.
Strict cel-shading and smooth cel-shading made without toon ramps. Left uses the step function while the right uses smoothstep to get the coefficient.
The simplicity of two-tone shading however, brings a lot of attention to some issues that don’t really appear with smooth PBR shading, and that is the control of the position and shape of the shadows. Indeed, since PBR shading doesn’t change that much from one pixel to the other, we don’t notice the slight differences or sharp discontinuities due to triangle interpolation, but the threshold we use will bring them out full force.
Left: Unappealing shading made obvious due to the threshold operation. Right: Adjusted shading giving a cleaner look. Figure credit to Colin Barton, who has worked plenty on the subject!
This problem is still a big one, long to explain, as well as still being the subject of academic research, so I’ll probably talk about shadow control and cel-shading in depth another time, but this is beyond this shorter article.
Finding the light coefficient
This control over the appearance is nice, but it does hide a simplification that we need to understand, and that is hidden inside the lighting coefficient. Up to now in this article we have used the n.l to good effect, and it can indeed be sufficient, but it has a few issues.
One issue is that you have a limited shading area, as in PBR we cut off everything under 0. One way to fix this is to remap the n.l from the [-1, 1] range to the [0, 1] range with this simple formula: lightingCoefficient = 0.5*nDotL + 0.5. This is known as the half lambert, and has been used in various games including TF2, but combined with toon ramps, this allows you to control the shading of the unlit part.
Another issue of n.l as a lighting coefficient is that it does limit material appearance, with for instance not being able to do rim lighting or specular highlights, since they are dependent on the view vector. This may be fixed by using the result of a shading model, such as the Blinn-Phong model, and converting that result to a lighting coefficient. More complex models may be used, but if you’re going for a simple artstyle maybe you probably don’t need fancy microfacet models.
However, using a shading model will also give you color data, which highlights another issue of simple toon ramps: how do you manage colour and coloured light ? The longer answer is complex and out of the scope of this introduction, but the simple answer is to use the luminance formula, which gives a single value for “how bright is that colour?” based on its RGB values. It is equal to 0.2126*R + 0.7152*G + 0.0722*B, but you may use other ones too. This will do the work pretty well in practice.
Light Accumulation
There is however still a big issue we have circled around, and that is managing multiple lights. In PBR, this is easy: you just add them. That’s how reality works. But here, we are manipulating that reality, so just like most video games it will break when you give it weird values. We need to rethink our approach.
The part where it breaks is the light accumulation step, where you take the results of each light and add them. If we keep it the same, it will just take our already transformed colours and add them, making them really bright. Whoops! The solution is thankfully not hard, but the order of operations is really important, as it can change the result.
The first part to think about is how do you combine lights? As we said, in PBR it’s a simple addition, but toon ramps I would recommend looking at the max operator instead. This will ensure the light remains in more expected outcomes, by basically just “changing the key light” as you go near it.
Another question, more specific to cel-shading, is when do you threshold? This one doesn’t have a clear answer, it depends on your style. Thresholding before the accumulation will keep your highlights separate, while doing it after will combine them. Which one looks better will depend on your exact scene, but I think thresholding before has better results because you don’t get smaller secondary highlights coming from the overlap of the two lights, which tend to look a bit chaotic in simplified artstyles.
Threshold after accumulation on the left, threshold before accumulation on the right. You’ll notice the different shape of the highlights.
To finish on the subject, I’ll list some of the primitives you have to link together:
- Shading Model: Gives you a color from the lighting information
- Luminance Formula: Gives you a coefficient from color
- Add: Adds two colours or two coefficients
- Max: Gives the highest of two coefficients (can be used for colours, but makes less sense)
- Thresholding: For cel shading, separates a coefficient into unlit and lit colours or coefficients.
- Toon Ramp: Takes a coefficient and outputs a colour
You always need the shading model at the start, and either add or max to accumulate several lights. Here are a few examples I can give you to get started:
- Cel Shading: Shading Model, Luminance Formula, Thresholding, Max, Toon Ramp. This gives you stable results that work, as we saw earlier.
- Toon Shading: Shading Model, Add, Luminance Formula, Toon Ramp. Toon shading can benefit from staying closer to PBR light accumulation methods, but in those cases it’s good to extend you toon ramp a bit to be able to give some extra oomph under lots of light.
- Don’t: Shading Model, Luminance Formula, Toon Ramp, Add. This one is gonna give you problems most of the time because you’re gonna add the unlit part over and over again, so unless you specifically account for that it’s gonna ruin your color choices. Unfortunately, this is the default for a lot of applications.
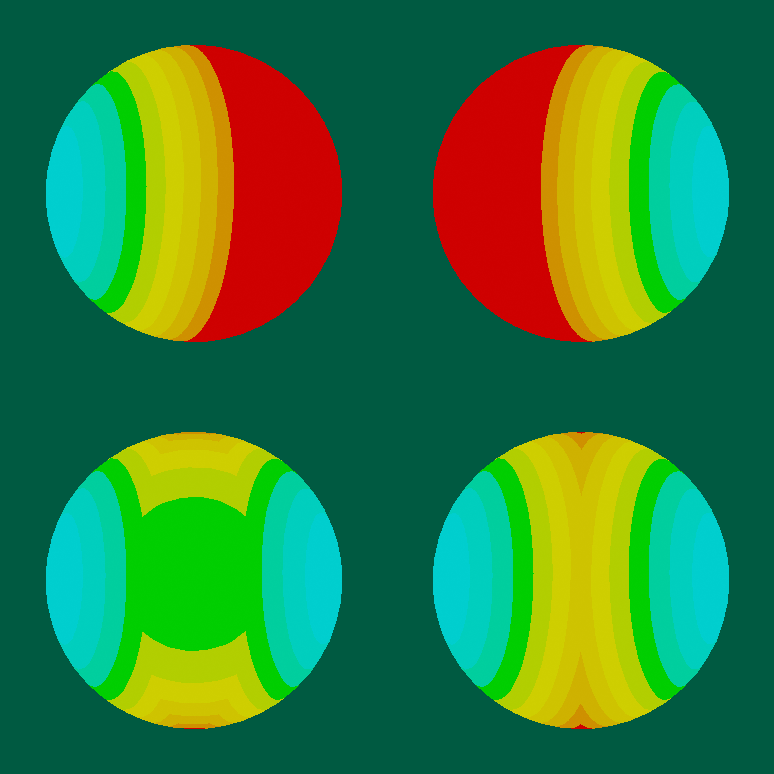
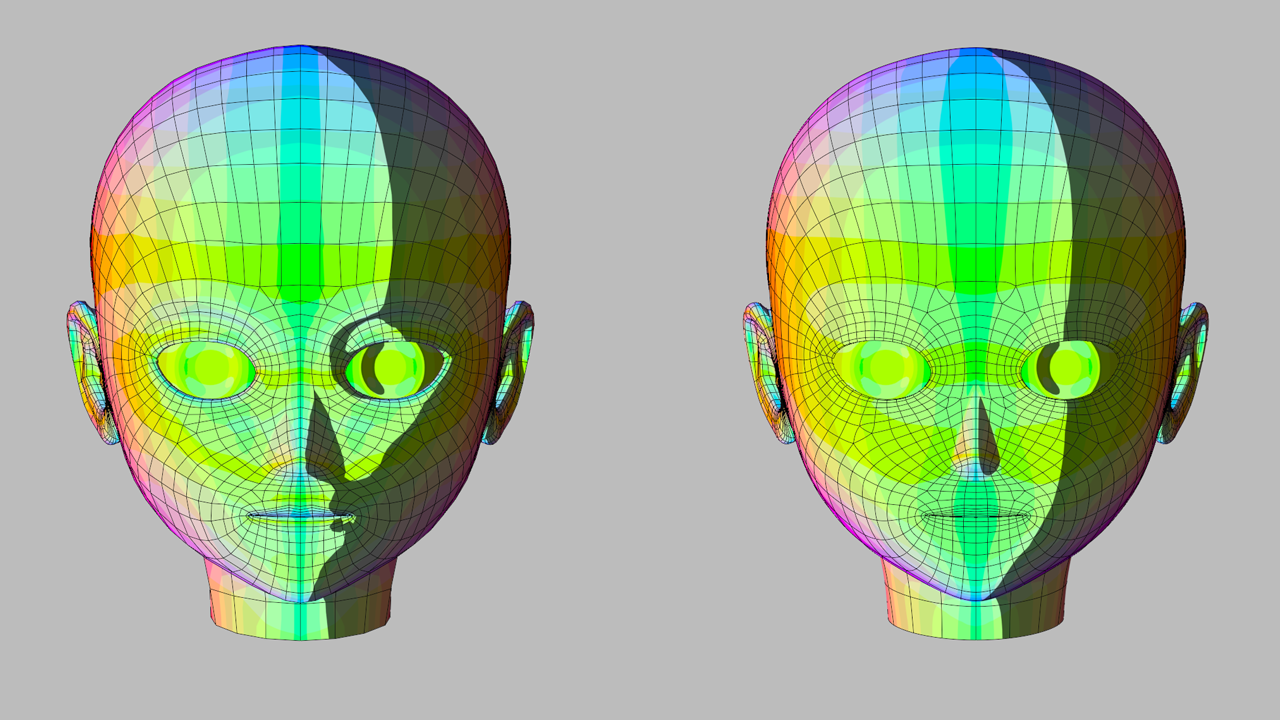
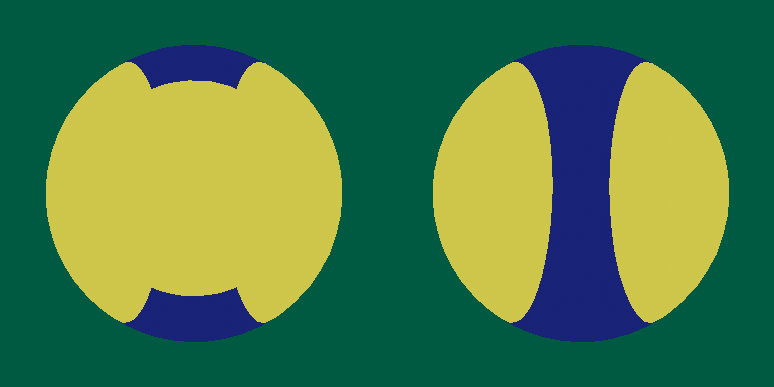
Visual representation of what happens under the hood. The top row shows the raw n.l of each light (posterized for easier understanding, red being zero), while the bottom row shows the accumulation (add for left, max for right). The thresholding will find all the green parts, thus explaining the new highlights appearing on the add method.
Of course, you can ignore of all that and only use one key light. This works really well for characters! This is the method a fair amount of games use, including Zelda Wind Waker and Guilty Gear Xrd. You’ll however need another model for environments as they often need more lights, but it’s usually okay to use non-toon ramp methods for it.
Expanding the method
So now that you know some basics of simple toon ramps, let’s look at how we can get some extra performance out of this! This is actually one of the first things I did in my computer graphics path, so they are pretty accessible.
More inputs: X-Toon
Up to now we’ve done a toon ramp with only one axis: the lighting coefficient. We’ve seen some of the limits and solutions, but we can also get some new effects by using additional parameters. This technique has been explored in a 2006 paper called X-Toon by Barla et al. It’s closer to tech art than pure rendering, which serves us well here.
One example would be distance. By mapping it to the second axis, you can achieve new effects like smoothing out the shading at a distance, or reducing it akin to LODs. This can help simplify the style a lot!
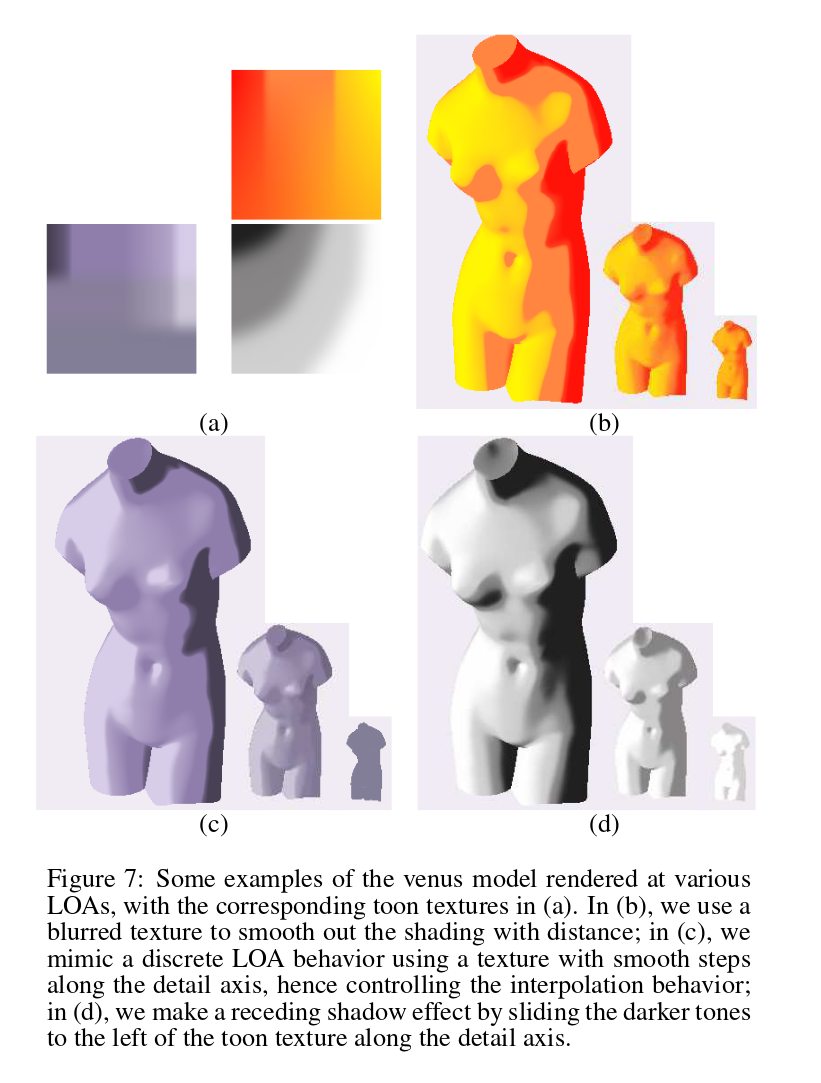
Examples from the X-Toon paper. Also works on environments!
Another one explored there is mapping the incidence angle, which you probably saw around more as the fresnel or rim light if you come from a 3D artist background. This can allow you to remake said rimlight, or achieve similar effects.
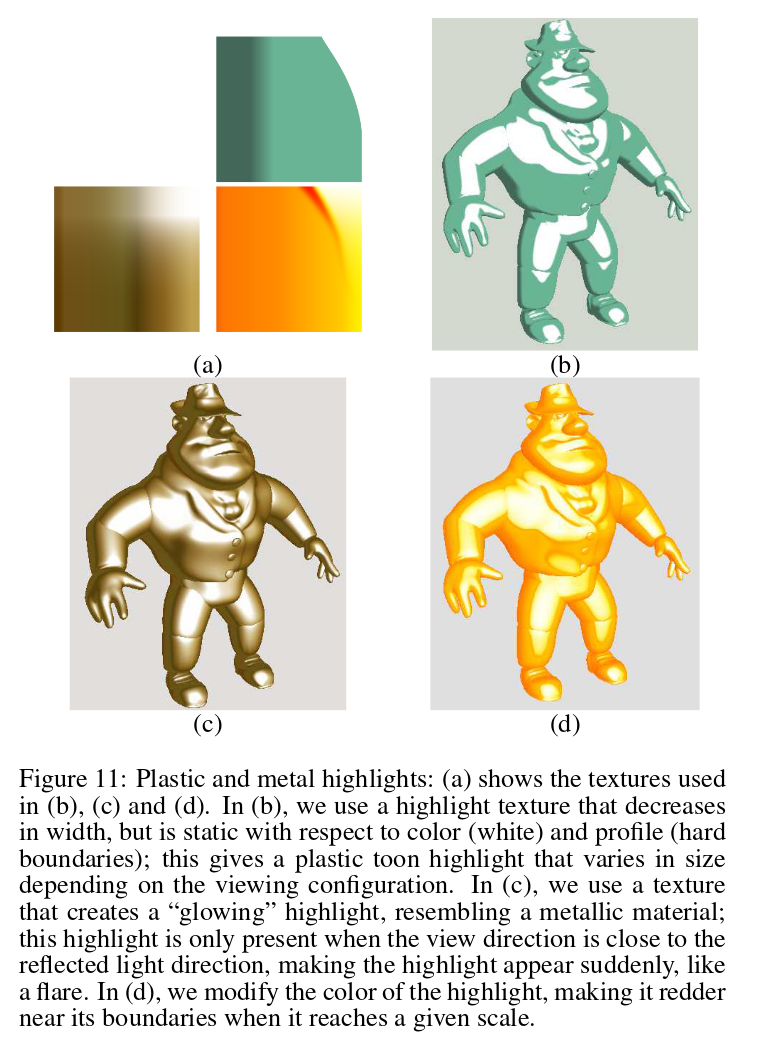
Additional examples from the X-Toon paper. Notice how you can see the red highlight on the gold both on the model and the ramp.
A last one, this time not from the paper but my first shader, would be mapping the specular. I’ve used it since I was working with metallic surfaces (because it was for mechs, of course). I don’t have screenshots of the base version anymore, but it allowed for more dynamic renders, as we’ll see in the next section.
I however wouldn’t do it like this nowadays, as I didn’t understand lighting coefficients yet, so I mapped diffuse and specular from the Blinn-Phong model directly. Since specular and diffuse aren’t independant, there’s lost space on the toon ramp, and if I had to do it again I would reserve some space for specular highlights on the lighting coefficient (if doing cel-shading).
This does however highlight some limitations of bidirectional toon ramps: they take up more space on the disk, and depending on your parameters not all of it is used. If a standard toon ramp size is 256x1, a standard 2-axis toon ramp is 256x256, while a 3-axis one is 256x256x256. Each step increases the size exponentially, so you have to be careful with that. 256x256 however is still very manageable, so it’s not as drastic, but 3-axis can be pretty big so you’re better of doing something more reusable, like…
Non-colour outputs: Shading Ramp
So this has also probably been done before (hopefully), but I haven’t seen records of anyone doing it. Haven’t looked too close either, but it’s probably basic enough that it didn’t get a specific mention. Since I don’t know an “official name”, I’ll call it the Shading Ramp, it’s good enough for this.
The difference between a classic toon ramp and a shading ramp, is that the former outputs a colour, while the second outputs arbitrary parameters. Of course, most of the time these will be about the colour.
Since you can’t really list all uses, I’ll give a few examples of what I’ve used it for so that you may build your own.
- You can map a shift in saturation and diffuse to the distance. This would allow you to for instance reduce detail when further away, creating a natural hierarchy.
- You can map lighting effects like bloom or glow to certain lighting conditions.
- In general, you can use shading ramps for the whole environment to simulate different lighting conditions or moods, like a more featured LUT.
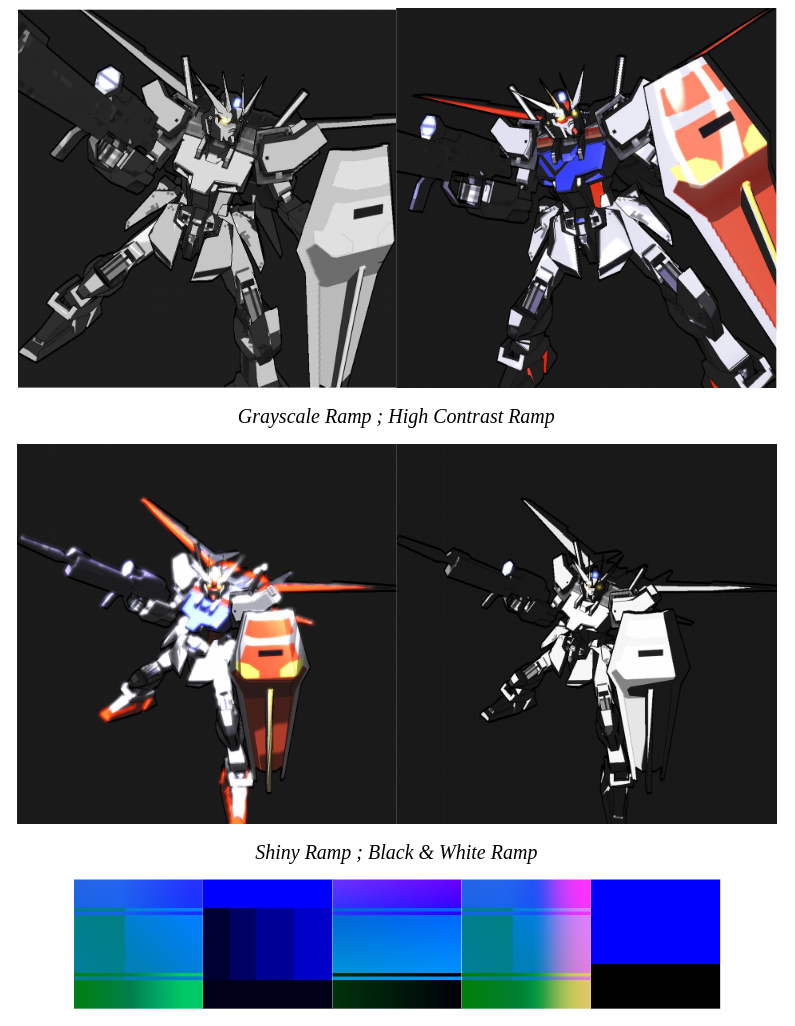
A few examples of shading ramps I’ve used in my first shader when I started learning rendering.
In practice
I won’t be going over exact implementations of each because I’m lazy because you’ll understand better if you try and apply it yourself (yeah sounds right), but I can give you a few tips for different engines. Some engine specific information may be a bit inaccurate / inefficient because either I don’t really use it (Unreal, Unity) or because I’ve gone in too deep on custom rendering pipelines and thus haven’t needed to figure out the “standard” way (Godot, Blender). Still, I believe this will help you start out!
General
- You can either apply it before light accumulation or after, this tends to require different pathways depending on your engine, not all of which are easily available.
- Colored light is complex (which is why it’s a bit out of scope of this article), so try doing it with white light at first.
- Toon ramps / thresholding tend to work better at a material level, shading ramps work better at a full-screen level in general.
- If you don’t have access to the complete n.l, you may be unable to shade the dark part.
- Getting projected shadow information separately from the local shading can be very useful.
- Watch out for overbrightening when using multiple lights, you may be better served with using only one key light.
Tools
- If doing cel-shading, you will want accurate control of the coefficient and possible smooth transitions.
- Toon ramps being gradients, it’s generally useful to have curve controls.
- 2D toon ramps are trickier, I would recommend either:
- Use several 1D toon ramps, if you don’t have a lot of them (for instance, if you only have 4 values on the second axis)
- Allow the user to set points in the space and lerp between them.
- Letting the user paint them can work, but it more suited to toon ramps.
- Creating the ramp through code can work wonders for shading ramps, as they are more abstract.
Engine-Specific
- Godot: Godot 3’s renderer is pretty simple, but on the flipside it does not offer a lot of features out of the box. This also means that some parts that are usually hidden are available. Here I think it’s going to be easier to do at the material level.
- Godot lets you customize the light accumulation function, which is SUPER USEFUL as we’ve seen. You have to do this by reading the previous value of
DIFFUSE_LIGHT. - You can get the shadow contribution separately through
ATTENUATION. - If you’re feeling funky, I’ve written on how to do more advanced rendering in Godot, and the example is simple cel-shading.
- Godot 4 I haven’t investigated yet because my vulkan drivers are broken, so stuff may have evolved thanks to the new renderer.
- Godot lets you customize the light accumulation function, which is SUPER USEFUL as we’ve seen. You have to do this by reading the previous value of
- Unity: URP is flexible, but uh, wouldn’t recommend the engine with what’s going on these days. Sad.
- Unreal: Unreal’s renderer is really solid for PBR, but you’re gonna have trouble here.
- PostProcessMaterials are good to implement shading ramps with, but it’s tricky to get the values. You have custom buffers though.
- Light accumulation is going to be a problem, as well as accessing the lower part of the n.l. You may quickly need to open up the engine code.
- Alternatively, I’ve seen people use unlit materials and uniforms filled out through code, in order to remake the basic rendering process. Seems tricky to setup, but could be worth it!
- Blender: I’m not super familiar with Blender nodes sorry, but I think you can do it easily before light accumulation.
- If you are using Malt, you can do it however you want since you have full control over the pipeline. I give an example of cel-shading in this article, but it’s code based. In fact, all images in this articles are generated with Malt!
If you actually use any of these and want to complete this, don’t hesitate to shoot me a mail!
Conclusion
And here you go, you now have a few basics down for toon ramps! I wanted to write this because, while still overall a simple subject, there are some hidden tricks to it, and they can be a bit long to explain. Hopefully this helps you in your own games and renders!
If you can understand all that, I believe you have a nice base to this part of tech art. Indeed, you can’t really be comprehensive in guides like these, since it would be like describing what you can do with a brush, it’s just too wide. Through smart use of these and other techniques, you can achieve a lot of artstyles, but you need that base intuition in order to innovate and find your way.
Of course this article is only touching the surface, but there are a lot more parts to this, including “how do you handle coloured light?”, “how do you handle projected shadows?”, and “how can you control the shading?”. Some of these can be really complex, and there hasn’t been a lot of artist-accessible literature on this as far as I’m aware. Still, I hope this will help you get started on this long path!
(Did you know I wrote the article in a few hours, then procrastinated for like a month or two for the images and the code needed to make them? Completely unrelated to this, I might start writing about something other than computer graphics sometime.)
I’m mostly focusing on lines since it’s my PhD subject, but if you want me to explain a specific subject, or have feedback, don’t hesitate to shoot me a mail! Until then, see you next time!